Monday, July 6, 2015

Quilting the Hawaiian Shirt Block

These instructions follow the blogpost from June 15, 2015, which gave instructions for constructing a Hawaiian Shirt Block.  Sisters in the Seams Like Sisters Quilt Bee will have a packet with the cut fabrics for making one block.  (If anyone needs more of the fabric, I have all the scraps and can get you what you need.  Please do not cut the large back in your packet)  If you need to cut out your own blocks, find it in the tab above, or here.  If you want to use this pattern, you may.  It would be nice if you referred to this post.  I ask that you don't sell this pattern.

Quilting the Block
The back of the block is cut to 18” across by 20” high.
Cut a piece of cotton quilt batting to this same size (18” by 20”).
The back and the batting will be larger than the front of the block.  Try to make the print on the block and the back orient in the same direction.  Most (not all) of the fabrics have an obvious top and bottom to the print.

About the batting: 100% cotton batting, either white or off white is fine.

Sandwich the three layers – back, batting and front.  Baste them together to prevent puckering; whatever way you are accustomed to basting.  You could hand-baste it or use a spray basting product that will wash out.

Thread color: you choose.  White or off-white is fine.  A color that blends or contrasts with the shirt is fine.  Use a stitch that is on the longer side maybe 6-8 stitches per inch, not very small.

Now you are ready to quilt the block.  For steps 1 – 3 you will not need to cut your thread or restart your stitching.

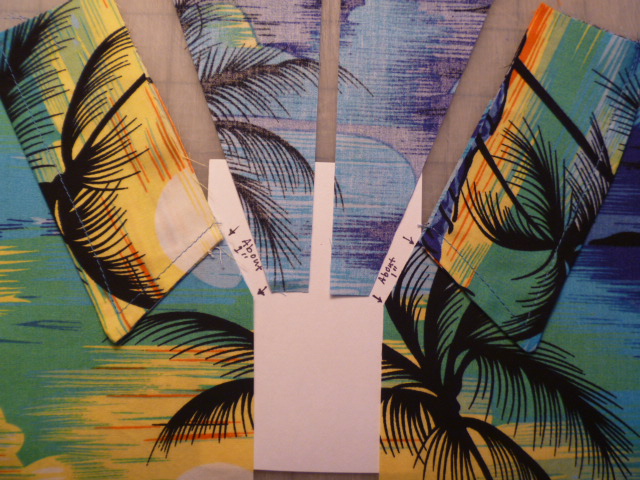
(1) Start at the point of the “V”.  Follow the arrows on illustration (1), stitching uniformly close to the seam around the triangle.  You will pivot twice, and notice arrows in the illustration at Pivot #1 and Pivot #2 at the corners of the triangle. You may need to be 1/8” to 1/4” away from the seam since the collar may get in the way.  End at the point of the “V”, with your needle in the block.

(2) Pivot at the point of the “V” (Pivot #3) and take just a few stitches to Pivot #4 (see orange instructions on the illustration).  When you pivot at Pivot #4, you will stitch down the center seam of the shirt 1/4” from the seam on the left side of the shirt (the non-pocket side).  Stop at the bottom of the shirt, leaving your needle in at Pivot #5.

(3) Now you will stitch all the way around the shirt “int the ditch” or very close to the edge of the shirt.  Start at Pivot #5, and end at the same point.  At the top of the shirt, you may need to stitch near or on the border fabric in order to avoid the collar.

(4) Quilt around the pocket… maybe 1/8” away from the pocket.  Be careful to leave the top of the pocket open.

Now you are ready to quilt the rest of the shirt. Illustrations (5) (6) or (7) give some ideas - or Use your own.  If there is a flower or car or tree or sunset or water or prominent shape on the fabric, use that as a guide or idea how to stitch the three layers together in an artistic way.  The illustrations are pretty simple.  The goal is the have stitching about every 2” – 3” over most of the shirt block.

The borders may be as small as 2” when we sew the blocks together.  With the quilt-as-you-go method we are using, we do not need stitching in the borders.


Sew on the Buttons
Sew 4 buttons on the shirt just to the left of the center seam.

And here are pictures from a block that has been quilted.  


Hawaiian Shirt Quilt Block

Notice the shadow quilting around the palm trees.  Notice the buttons!


Have Fun!!!
CathyH

Monday, June 15, 2015

Construct a Hawaiian Shirt Quilt Block

These instructions are specifically for the Quilting Bee - Seams Like Sisters. The instructions will assume you have zipper bag of cut pieces that include:

2 Sleeves        =  “house” shaped pieces
2 Shirt Fronts  =  2 rectangles 5” by 12” with a small triangle cut off it
2 Collars         =  Looks like . . . a collar
2 Inserts          =  2” by 5” triangles with smallest points cut off
1 Pocket          =  Looks like a pocket!

Sew the Sleeve

Make a French seam on the “underarm” seam of the sleeve by, first, folding the pattern in half, WRONG sides together.


Sew a scant 1/4” seam on both sleeves at the underarm seam.
Please backstitch when you begin and when you end.


Turn the sleeve so the wrong side of the fabric is out, and press a crease at the seam you just made, folding the sleeve in half.


Sew a scant 3/8” French seam on the under arm seam
(you are hiding the raw edges of the seam). Please backstitch as you begin and end.
Turn right side out and press the whole sleeve in half, with the underarm French seam you made at the bottom fold. 
 
Install the Collar
Place both Shirt Front pieces right side up, with the triangular cut outs at the top, center so it makes a “V” like at the top, front of a shirt.

Place the Collar right side up on the diagonal cut. Place the Collar about 1” from the center. Secure with a pin or two.

Now trim the part of the collar that extends over the top edge of the Shirt Front.


Place the “Insert” WRONG side up oriented like it would complete the triangle cut from the shirt rectangle. (Do this for both the left and right side of the shirt) We are going to make this triangular piece look like the inside of the shirt, so we want the wrong side of the fabric to show.
 

Fold the triangle over the collar and shirt and pin so you can sew a seam through all three layers:
A. the Shirt Front rectangle, right side up
B. the Collar, right side up and
C. the Insert, right side up.

These should all be lined up along that cut-off triangle on the shirt rectangle. The Triangle will be too big. That’s ok.


Mark where the shirt ends, top and bottom, with a pin so you can take a backstitch at the beginning and the end. (I stitched from the back side..) You may need to remove the pins previously used to hold the collar in place under the triangle. Stitch this seam through all three layers.


From the wrong side, press the seam allowance towards the shirt and press the Collar towards the Insert.


Turn to the right side of the pieces and now press the collar towards the shirt.


Trim the Insert so that the inserted triangle is part of one large rectangle that is one half of the shirt front.


Sew the Front, Middle, Seam
 
You now have two rectangles, each with a collar piece and an inserted triangle. Place them face to face,  right sides together and secure with pins.


Attempt to make the collar seams match and make a “V”. Also take care to keep the seam allowances directed toward the shirt, not the Insert.


Sew a generous 1/4” seam. Be careful not to sew the collar points into this seam.
Press the seam open


Trim the Square

Trim the entire block to be 8-1/2” by 10-1/2” by trimming carefully as follows:

Trim to 4-1/4” from the center on the left.
Trim to 4-1/4” from the center on the right. 
  

Trim any dog-ears or random tidbits from the top of the block and trim the bottom so that the block is 10-1/2” tall.

 Make the Pocket

Fold the top of the pocket down 1/4” once, and then, 1/4” again. Topstitch across this edge, close to the fold.


Position the tag on the pocket 3/4” from the top of the pocket and centered left to right. Topstitch around the tag. Do not back stitch to start or stop, but pull the top threads through to the back and tie them in a knot with the bobbin threads. Trim the threads – being careful not to cut your knot.

Fold in the raw edges 1/4” all around the other three sides. Press. Topstitch the three sides to the shirt, centering it on the right half of the shirt about one inch below the collar.Do not back stitch to start or stop, but pull the top threads through to the back and tie them in a knot with the bobbin threads. Trim the threads – being careful not to cut your knot.


Install the Borders and the Sleeves

 Position the sleeves near the top of the shirt, one on the right and one on the left in a way that looks appropriate. Be sure to place it around 1/2" below the top of the block.  You will sew these into the seam with the right border and the left border.


Fold the sleeves onto the shirt as you have positioned them, being careful to keep them at least 1/2” from the top of the block.


Take two border strips that are 3-1/2” by 10-1/2” and sew one to the left side and one to the right side, being sure to catch the unfinished side of the sleeves in these seams. 


Press seam allowances toward the shirt.

Take two more border strips that are 3-1/2” by 14-1/2” and sew one across the top and one across the bottom of the block. Take care with the collar to make it look like a real collar.
Instead of pulling the
collar tightly over the shirt at the seam where it is sewn, make a small pleat, a small wrinkle, to make it look 3 dimensional.  You can sew this into the seam in the top border.

Press seams towards the border.

Aloha!

CathyH

Monday, June 8, 2015

Cutting 60 Degree Diamonds

I have lots of scraps.

I went through my scraps in the past few months and cut the little pieces into useful pieces.  Along the way I decided to cut 60 Degree Diamonds from my scraps in order to have a hand-piecing project. I plan to use the English Paper Piecing Method to make stars from these Diamonds. 


Well - I also cut out a full quilt's worth of diamonds for one friend and a table runner's worth of diamonds for a couple other friends. 

So, I have recently cut HUNDREDS of diamonds.

And I want to share the method I used to cut 60 degree diamonds.  
The measurements are for paper diamonds that are 2" on each side,
thus the fabric has to be a bit bigger than that.

STEP 1.
Cut two strips of your chosen fabric, 2 3/8 " by 10".  
It is pretty important that the left edge be squared off. . . 
Stack the two strips on top of each other.  You will cut two diamonds at a time.


STEP 2.  Find a ruler in your collection that looks like one of these below.  

You can use a Hexagon Ruler

You can use a square Ruler that
has these markings on it

You can use a larger ruler that has diagonal lines like this ruler.

.... Even though the diagonal lines on the large ruler do not go all the way to the corner.
 STEP 3.  Now you need to prepare to cut a little triangle off the left edge of the strip.  Your geometry teacher tried to get you to be intimately familiar with this very special triangle.  It is a 30-60-90 degree Triangle.  When you cut off that little triangle on the left, you are making a 60 degree angle inside the diamond you are cutting.  And THAT is your goal!


Use a Hexagon Ruler

Or one of the other rulers that have a 60 degree diagonal line printed on it
STEP 4.  Cut off that little triangle on the left so your strip looks like this:


 STEP 5.  Now you are going to cut parallel lines with a ruler
                       where you can see how to cut 2 3/8".

The ruler is positioned on the left edge at 2 3/8 ".
Cut on the right edge for your first pair of diamonds.


Cut once, twice, three times, each time 2 3/8" from the left edge of the last cut.


To actually construct the quilt, you will also need 2 inch paper (60 degree) diamonds.
You can buy them already cut. (I see a future tutorial!)
You can make your own.


Quick Summary: 

STEP 1. Cut 2 strips of fabric, 2 3/8" by 10 ".  Stack them on top of each other
STEP 2. Get your ruler ready
STEP 3. Line up your ruler
STEP 4. Cut off that first little triangle
STEP 5. Make 3 cuts parallel to that first cut.


Diamonds are a girl's best friend.

CathyH


Wednesday, May 20, 2015

I Spy in the Cubby-Holes

I have always been intrigued by optical illusions.
So I decided to use the 'attic windows' idea to create an I Spy for a special friend.
(A special Grandma)


60 Pictures to Spy.
And hours of fun with the Grandchildren.

I'm posting about this artistic endeavor - and am entering this quilt in the 


You can visit the Festival and Vote for your favorite quilts in all the categories
by clicking HERE

AmysCreativeSide.com


I got to practice making y-seams (60 of them!) and got pretty good at it.

To add to the optical illusion effect, I felt the picture frames needed a black highlight in the diagonal seam... so I hand embroidered a black accent line in each square.

(hmm... the quilt was not hanging straight on the fence - 
and wind was blowing so the lines are kinda wavy in this photo...)
You can see the black embroidery accents in this photo.

I plan to sign the quilt on one of those baseballs - 
the ball next to the one with Babe Ruth's autograph.


I used black strips as lattice on the front.  The strips on the front I cut at 1.25 inches.  
With my a-little-more-than-quarter-inch-seams, the black lattice finished at around 3/4 inches.

You can read about how to construct the quilt using this technique by visiting  The Happy Zombie .

But the part of the quilt that just makes me SMILE is the BACK.


Using the quilt-as-you-go method, I varied the colors of the linking lattice 
to create this really fun rainbow effect.
And the denim will make this perfect to use as a picnic blanket.

This Grandma has a daughter who participated in a Quilt Club I had when my girls were in high school.  I had a signature fabric that I included in a number of blocks I made for the girls.  Chocolate.  It was chocolate fabric.  And that fabric makes its appearance in this quilt as well.


I tried to make the whole quilt look like maybe it was a bookshelf of Cubby-holes.
You can see the left border appearing like the side of a bookshelf.
You can see the top of the bookshelf, as well.


And I notched the top right hand corner to finish the illusion of a bookshelf.
  

This Quilt was just so much fun to make.
I hope you will go and vote for your favorite Art Quilt at the Blogger's Quilt Festival HERE.


You can also access all of the categories in the Blogger's Quilt Fest
And
you can nominate and/or vote for your favorite in the Viewer's Choice category HERE.


How fun is this?!  To go to a Quilt Show and not have to leave your home.
And
YOU get to have a say in which quilts win the prizes.


CathyH